The iCandy Lime
As one of the most inexperienced members of the team with babies and prams. Baby Birds thought it would be a good idea for myself to try and assemble one of the best selling iCandy prams we have at the moment. The iCandy Lime. And an hour to do it. Here’s how it went.
There are videos of demonstrations on how to build such a pram, and it goes without saying do not use the pram until you are 100% certain it is safe for your baby. A doll to practice with and test is a good idea if unsure.
The iCandy lime comes with all the necessary parts and even accessories so you can have the pram with a carrycot, with a car seat (sold separately) or just with the original seat unit. After going through the instructions I came to realise the instructions were showing me how to attach the car seat to the frame. Be aware and be sure what sort of pram accessory you are wanting to attach. As a complete novice, this is an easy mistake to make. But if you are experienced with the odd pram or can read a manual properly, the build itself is fairly straightforward.
Step 1
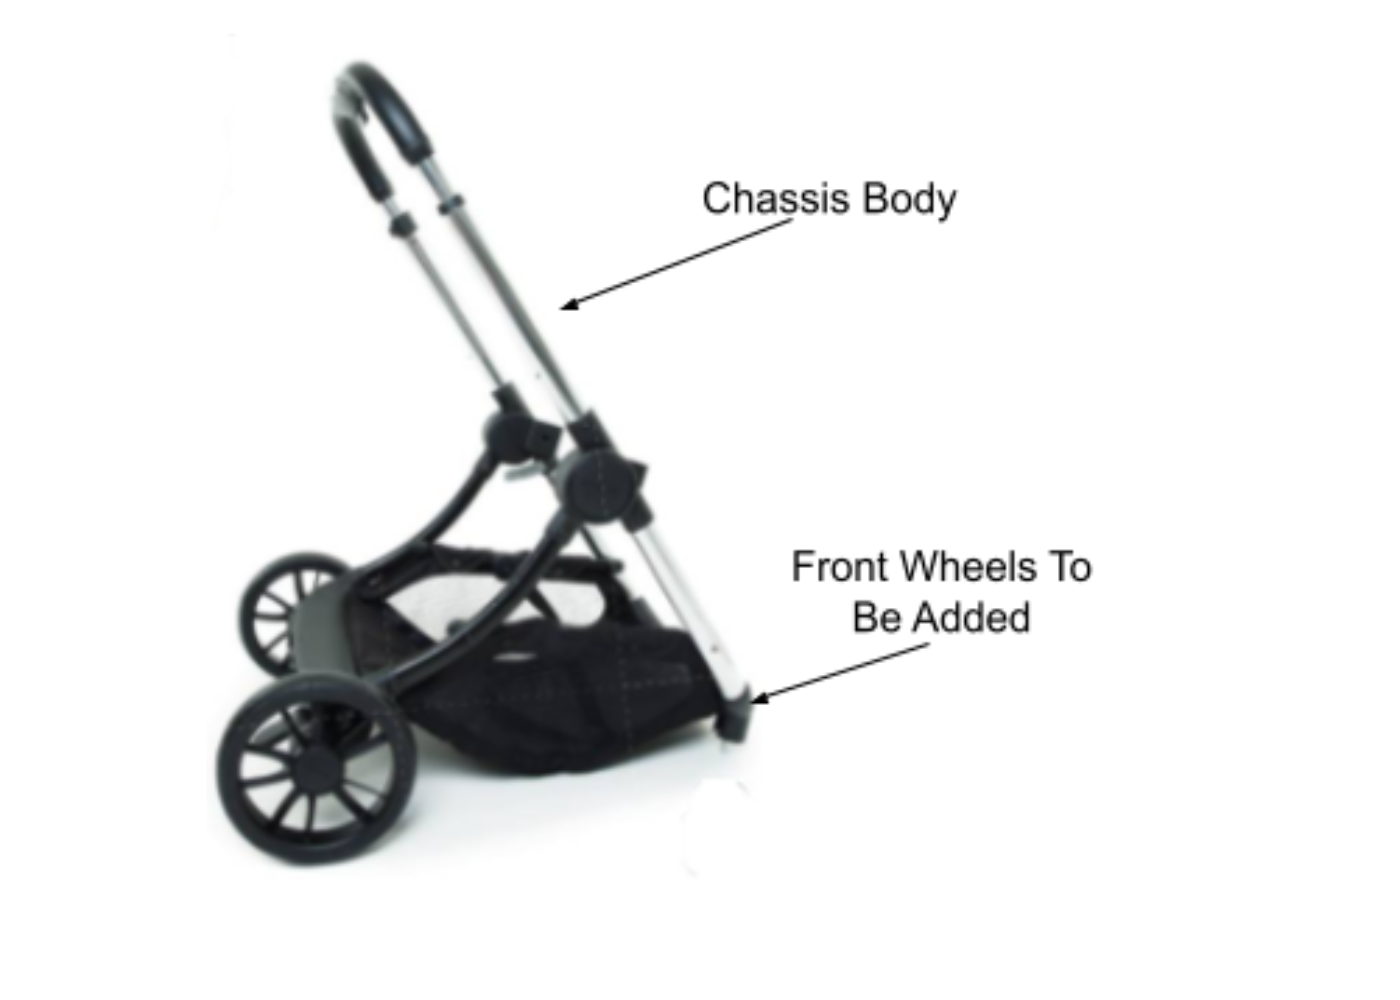
The chassis is where you will start. You will need to unfold the chassis and then you simply slot the larger wheels into place with a click. The two smaller wheels come with added suspension, making the ride smooth and the pram more durable. These two can be added with a click. Once you have the wheels in place and the chassis has been extended then you can move onto fixing the frame together.
With the iCandy Lime the main seat will come already attached to the frame. It is easy to remove but must be done if you are looking to add a carrycot or a car seat. As someone who hasn’t put a pram together before, this only became clear to me at a later date. Don’t make the same mistake as me. You are not missing a frame, you just have to remove the seat unit which is easily done with velcro.

Step 2
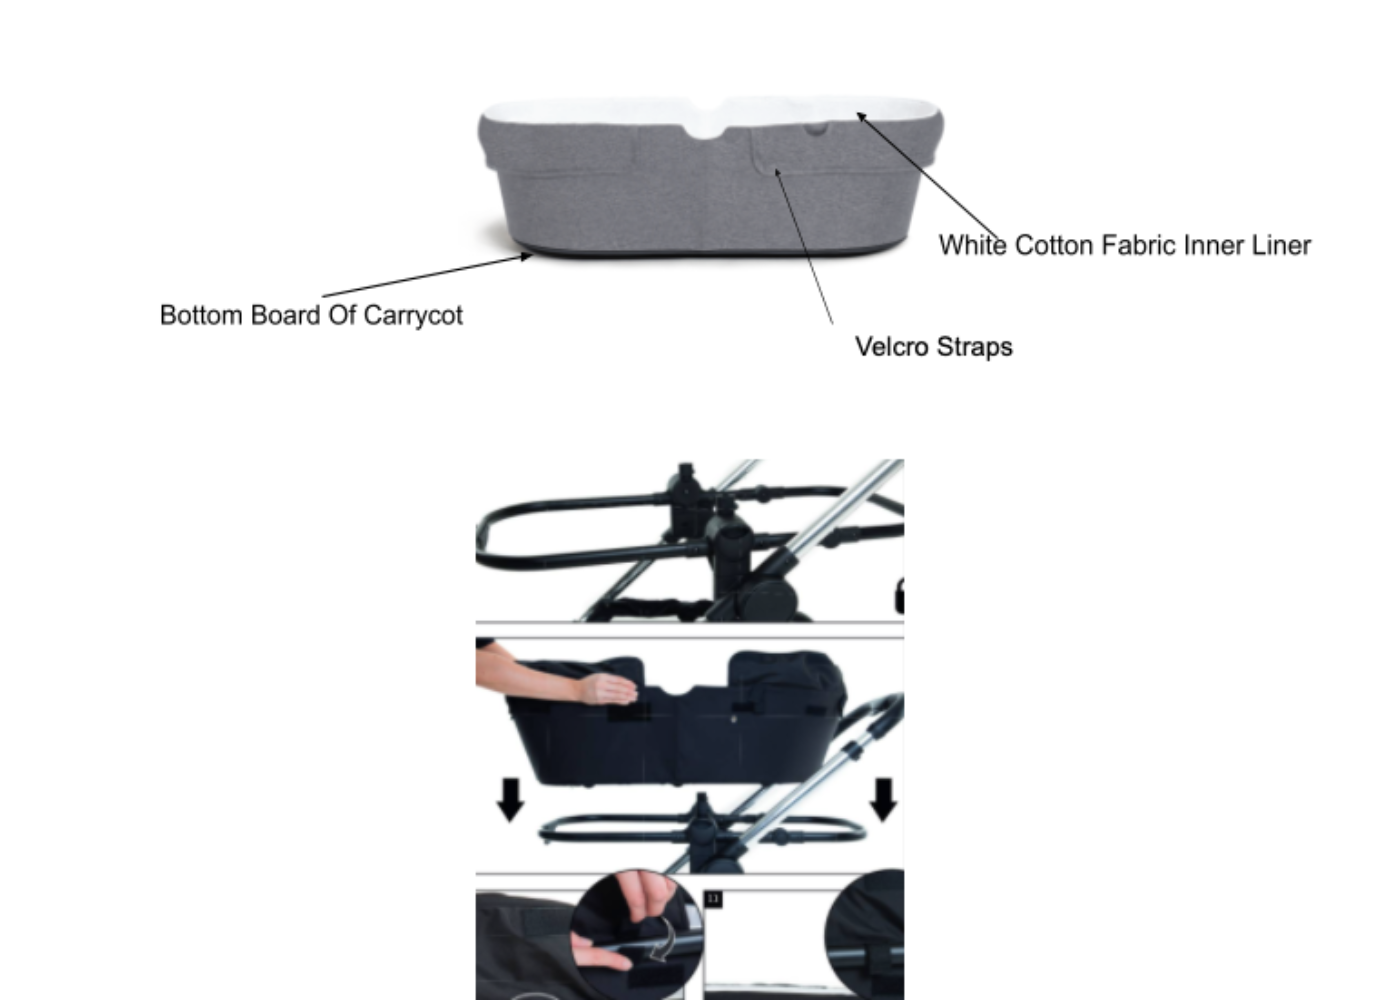
You will need to add the frame to the chassis which clicks in the centre of the chassis. If you are looking to add a carrycot you need to adjust the frame so it is horizontal, you can do this with a push of a button at the back end of the frame. Once it is horizontal, you are ready to make up the carrycot. The carrycot comes folded for packaging, so you will need to unfold it so it’s on the inside of the carrycot. You will then need to add the base to the carrycot. You just unzip the bottom, and slot the base into place. Then add the mattress into the carrycot.
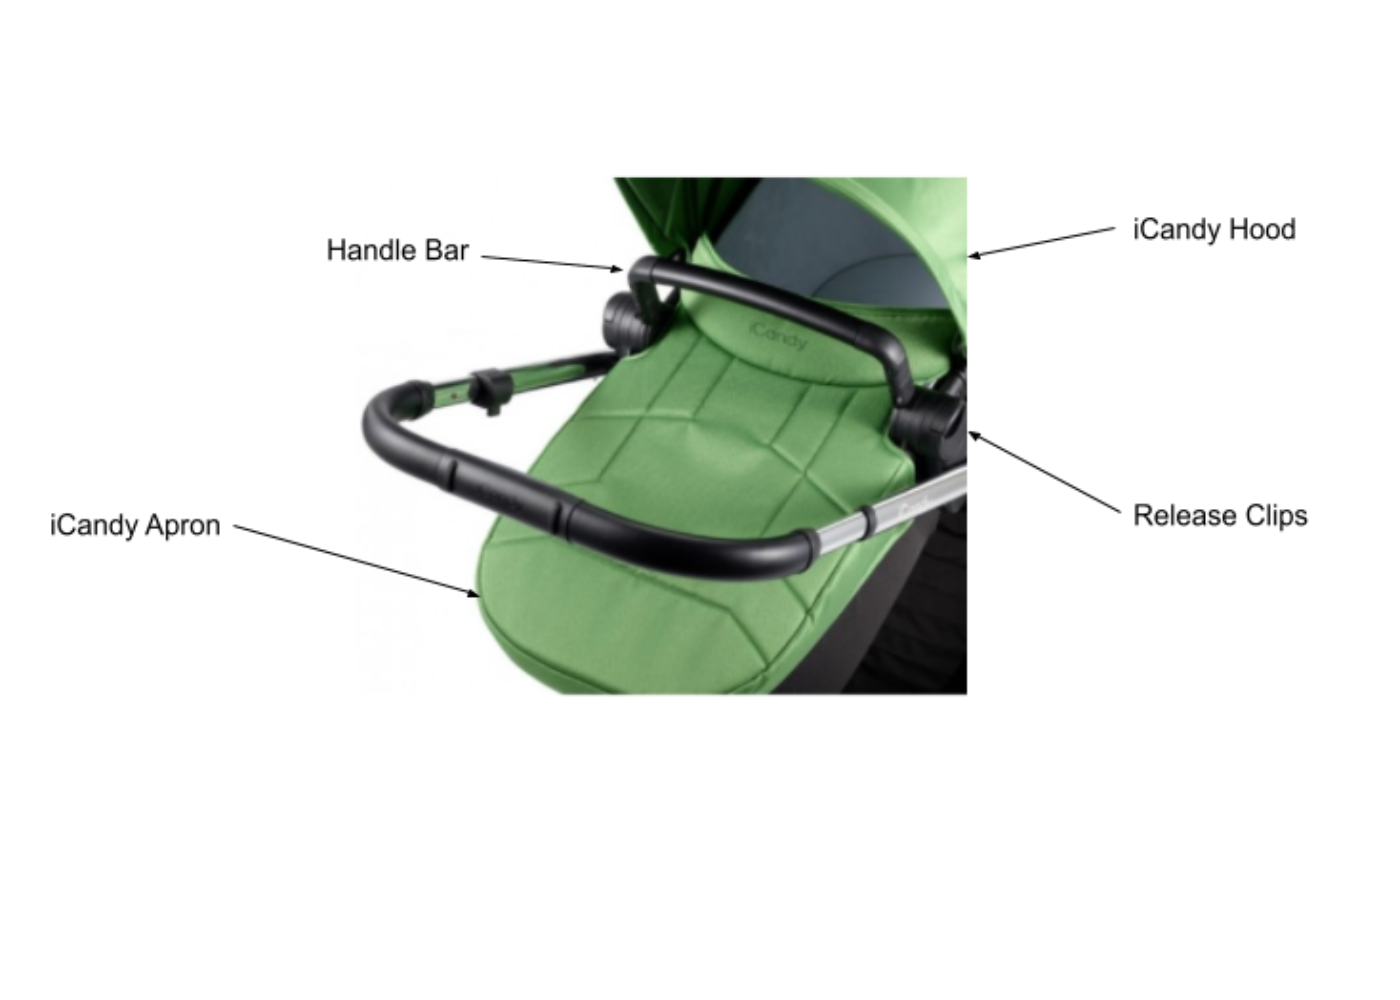
You can then add it to the frame by attaching it with velcro and using the fabric of the cot to the outside of the frame. Once it’s secure it should be safe enough to hold your baby’s weight. You can now add the hood which attaches with button style clips. The hood loops over the back of the pram, and you can then attach the apron for the carrycot. You then simply clip it into place. The handlebar just needs to be slotted into place and you are ready to go.

Step 3
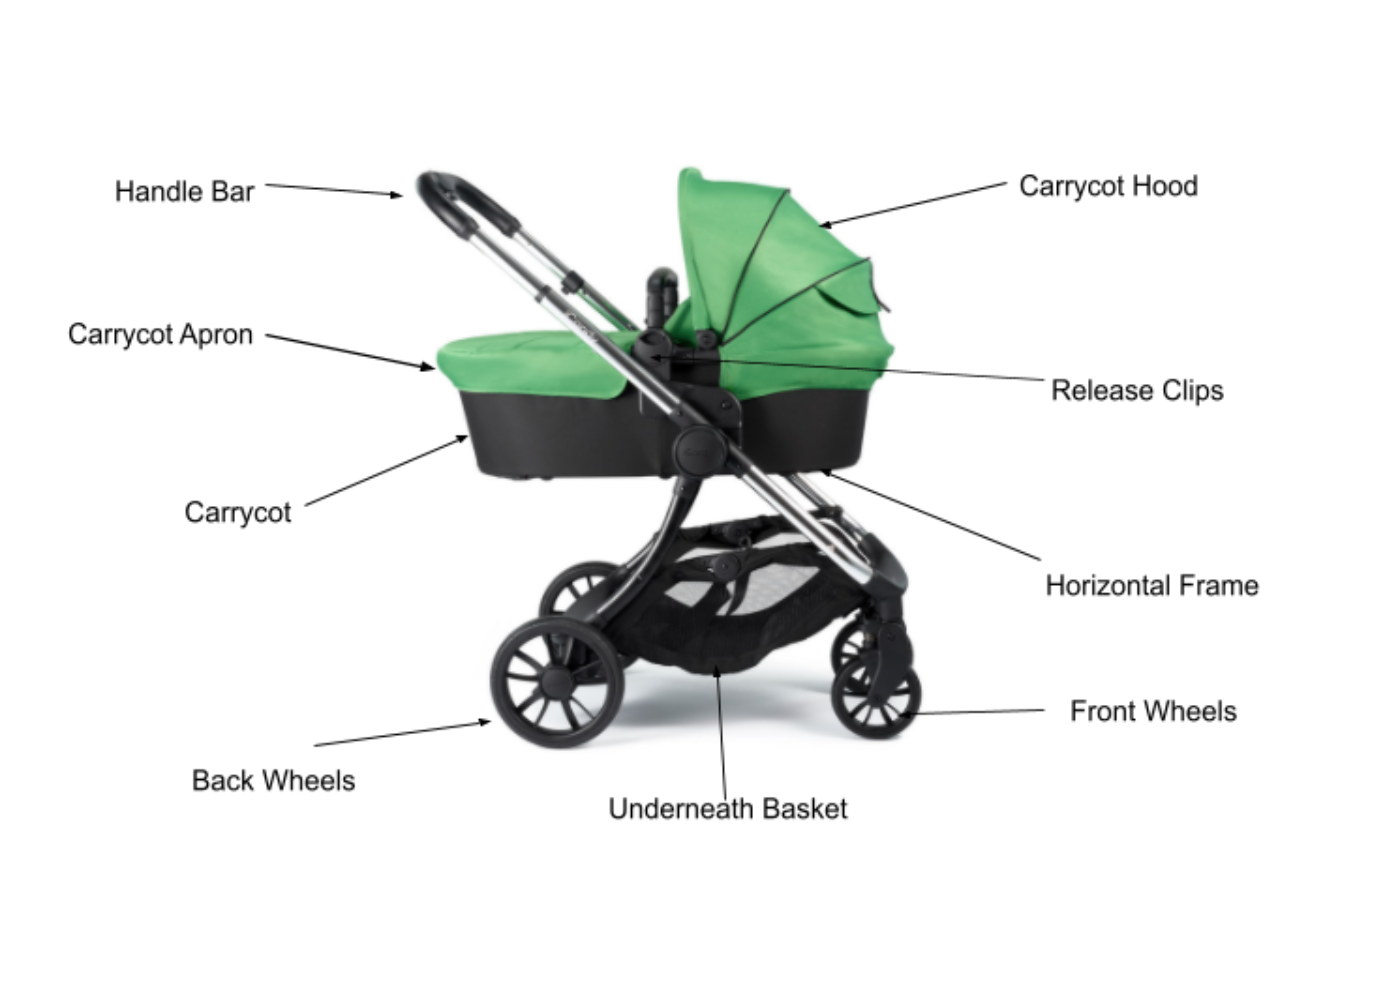
Your final pram should be secure and in place. The final carrycot model should look the same as the picture. If you want to remove the carrycot you can remove it by lifting the two release clips which are situated next to the handle bar. You can then add the main seat unit, or a car seat if you’re popping out from the car and don’t want to disturb baby.
As previously mentioned you can use the iCandy with a carrycot, car seat and other accessories. One pram, for all your needs. The iCandy lime.

Finished product
This pram is simple, stylish and practical. It comes in different colours so you can mix and match what colours suit your style. As a novice, I found it simple to make up, although some parts such as the release clips can be tight and will need a little force at times.
The practicality and ease of use will depend on which item you need. The carrycot requires the most amount of assemblance and can be used from birth up to six months. The main seat unit can hold up to 15kg which depending on your child is around the ages of 2-3.
Overall, I managed to complete the build within the time period allocated. This was a new experience for me, and anyone who is unsure of prams or is not sure where to start I would recommend the iCandy lime. If you are familiar with prams, assemble should be easy and simple.


